Prerequisites
- Slack Workspace Admin permissions
- Microsoft Teams Tenant Admin permissions
For Full Microsoft Teams instructions,
see this page.
Step 1
Install Centro Slack App
Click Add to Slack, make sure you pick the correct workspace:

Step 2
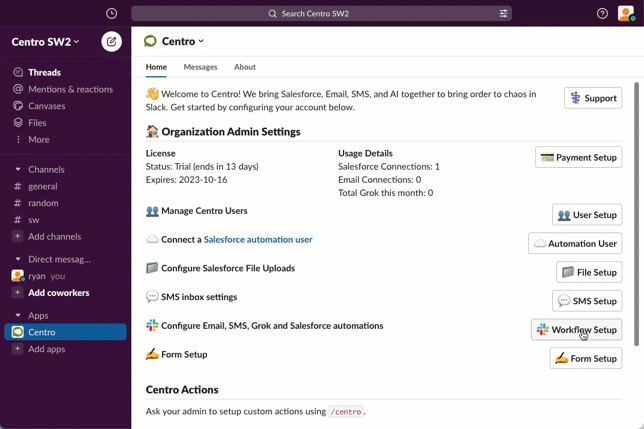
Connect to Salesforce
From the Centro App Home, Connect to Salesforce (note you can configure to use a Service user)
Then in Salesforce, go to Setup->Connect Apps->Connected Apps OAuth Usage, find Centro, and click Install.
.gif)

Step 3 - Optional
Review Form Sample
Centro provides a sample form to get you started! Click
Form Setup, then click the "..." next to Create Case from Message. You'll see a form for Cases built out.
For testing, you can leave this form alone for now. If you need help configuring this form, see
this documentation or you can always send a message from the Centro Home tab! Someone from our team will get back to you quickly.

Step 4
Add the Form to an Action
Next, Click Workflow Setup, then find "Create Salesforce Case Message Shortcut". Click Enable, then click "Submit Centro Salesforce Form" on the next screen. Drop the Show Form and select our Crease Case from Message form. Click Save, and close the Workflow Setup Screen
Step 5
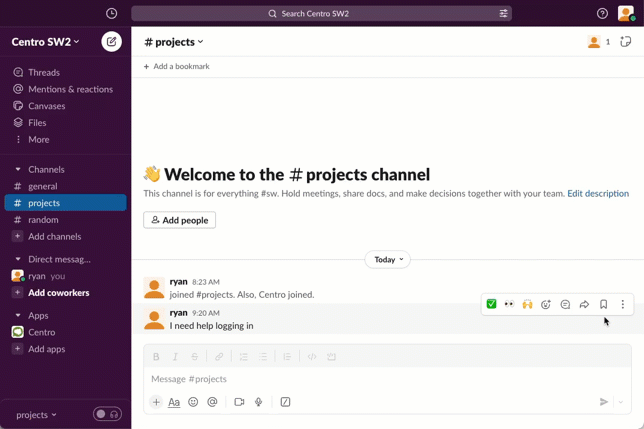
Test the Form
Now go to any message in any Channel, and click the More Actions as you over over a message. (Don't see the message shortcut? Click More Message Shortcuts) Click the Create Case short cut, fill out the form, and your Case will be saved and linked back to Salesforce!
Step 6 (Optional)
Add the Live Links Component to the Case Page Layout
You can now simply drag the Linked Conversations component anywhere on your Case page layout, and see and have live conversations with those in Slack. See
this documentation for more!